This is an easy animation you can do with CorelDRAW®. This tutorial uses CorelDRAW 8 or 9 to create the frames and Adobe® ImageReady™ to animate them. For those who don't have ImageReady, you can use any other animation program to make the animated GIF (click here for Royal E. Frazier's software page). For this tutorial, you also need the clip art image COFFEET.CDR (in the Food/Drinks folder of the CorelDRAW 8 or 9 clipart collection) or COFFEET.CCX (in the Food4 folder of the ccx clipart in one of the Corel Gallery collections available commercially). You can probably find this image in most any Corel clipart collection or substitute one of your own.

1. First, startup CorelDRAW and open the file. Next, click the "Landscape" button on the toolbar to switch the page orientation. This will give us enough room to make the frames.
2. Select the object group and drag it to the left of the page.

3. Your workspace should look something like the one below.

4. We need to modify some of the objects so while the group is still selected, click Arrange > Ungroup.

5. Now the drawing will appear as separate objects.

6. Next, click the Rectangle Tool and drag a rectangle around the coffee cup. This will provide a common frame of reference for each frame so they will align with each other when they are assembled.
 |
| Tip: Creating a rectangle as a common frame of reference for each image is a standard way to make frames for animations. Do this whether you keep the rectangle in the finished animation or get rid of it by cropping it out. |
7. The rectangle will still be selected after you draw it.

8. Click the "To Back" button on the toolbar to send it to the back of the stack, then click a color button to give it a fill. In this case I used 20% black for the fill.
| | Tip: If you want a transparent background for the finished animation, then set the background color to be the same as the background color over which it will be displayed. Then export each frame as a GIF image and select "Anti-aliasing" in the Bitmap Export dialog. You will see another dialog where you can set the background color to be transparent. This will provide a matte color which will blend the anti-aliased pixels into the background perfectly. |
9. Your workspace should look something like the one below.

10. You are now ready to export the first frame image. Using the Pick Tool, marquee-select the frame.

11. With the first frame selected, your workspace should look something like the one below.

12. Next, click File > Export... to export the frame as an image.

13. In the Export dialog, choose the "Selected Only" check box. This will export only the selected objects as an image. Use a True Color file format. In this case I am using the Photoshop PSD file format. Give it a filename and click "Export". Save all the frame images in the same folder.

| | Tip: Name the sequence of frame images with the same file name ending with 1, 2, 3, etc. Many animation programs recognize files named this way as an image sequence. You can take advantage of this and load the whole frame sequence at once. |
| | | |
 | | Note: You don't have to save images in Photoshop format. This format is just my personal preference. You can choose any of the other true color raster formats such as TIFF or PICT or BMP. Just don't use a lossy format such as JPEG or a format that isn't true color like GIF (more here on color depth and true color). The reason is that when the finished animated GIF is created the color depth will be reduced to a maximum of 256 colors. You don't want to start with a limited palette. Rather, you want all the colors available before the GIF animation is generated. |
14. Next, you will see a dialog. Use the following settings circled or underlined in the graphic below:
RGB Color
Anti-aliasing
1 to 1 Size
72 dpi resolution

We want RGB color (24-bit True Color). The GIF file format only supports a maximum of 256 colors more here on True Color and the GIF file format. If you save the frames as individual GIF images, each will have a different palette and and there may be flickering between the frames because of the different colors. By saving the frames in True Color, the animation program will generate a common palette for all the frames. Alternately, you can export frames as GIF images if you want a transparent background. You just need to be aware that there is a tradeoff between color depth and transparency.
Anti-aliasing will give the images a smooth appearance. Otherwise the images will appear jagged more here on anti-aliasing.
Choose a 1 to 1 size. If you want the finished animation to be smaller or larger, then adjust this amount.
Since the finished animation is for a screen display, choose 72 dpi for the resolution more here on resolution.
15. Next, we want to duplicate the frame. Click Ctrl-D or Edit > Copy followed by Edit > Paste, then drag the duplicate to the right of the first frame.

16. The duplicated frame appears to the right of the first one.

| | Tip: This is the best way to animate frames in a vector graphics application such as CorelDRAW®, Deneba Canvas™, Adobe® Illustrator® or Macromedia® FreeHand®. By duplicating the previous frame, you can make small changes to the vector objects and achieve a smooth animation. |
17. In this frame we will modify the steam objects. There are 3 columns of steam (left, center and right). We are going to make the left one fall, and make the center and right ones rise. Start by selecting the left steam column.

18. Using the Pick Tool, grab the top center handle and drag downwards slightly.

19. Select the right steam column and drag upwards slightly.

20. Then select the center steam column and drag upwards slightly.

21. You are now ready to export the second frame. Using the Pick Tool, marquee-select the frame.

22. The selected frame should appear like the one below.

23. Export the frame using the same settings as in a previous step. Give it the same filename as the one before ending it with a "2" instead. Make sure to choose "Selected Only" (circled below) just like before.

24. Duplicate the frame using Ctrl-D or Edit > Copy followed by Edit > Paste, then drag the duplicate to the right of the second frame.

25. Select the left steam column and drag it downwards slightly.

26. Select the right steam column and drag it upwards slightly.

27. Select the center steam column and drag it upwards slightly.

28. Marquee-select the frame with the Pick Tool.

29. Once again, export the frame using the same settings as before. Give it the same filename as the two previous ones and end it with a "3". Remember to choose "Selected Only" (circled below).

30. Below is a shot of the document with the three frames. You should save the document and quit CorelDRAW®.

31. Launch Adobe® ImageReady™ and click File > Import > Folder as Frames.

32. Navigate to the folder containing the frames and click "Choose" on the Mac®...

or "OK" on a Windows® system.

33. You will see the first frame in the document window.

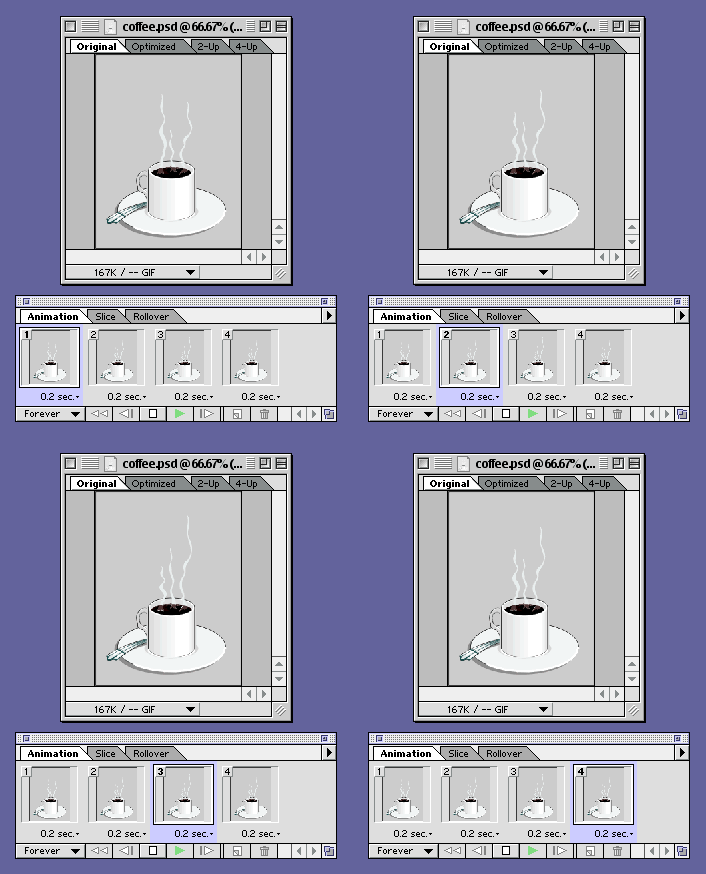
34. The Animation palette will display the 3 frames.

35. Click on frame 3 in the Animation palette.

36. Click the "Duplicate Frame" button. This will add a 4th frame that is a duplicate of frame 3.

37. Then in the Layers palette, click layer 2 to make it visible (below left), then click the visibility icon on layer 3 (below right) to hide it. This makes layer 2 visible in frame 4.
Note: Alternately, you could have duplicated frame 2 and dragged it to the right in the Animation palette.
38. The default timing for imported frames is zero seconds delay. You can adjust the timing on all the frames at once. Frame 4 is still selected. Shift-Click frame 1 to select all four frames.

39. Click the small triangle to the right of the words "0 sec." under one of the frames.

40. This brings up the Frame Delay menu. In this case choose .2 seconds.

41. Notice now that all the frames are set to .2 seconds delay (5 frames per second).

42. Click the play button (circled below) on the Animation palette to preview the animation.
43. Now we are ready to export the animated GIF file. Setup the Optimize palette with these settings:
GIF
Adaptive
No Dither | GIF89a file format
Uses an adaptive palette
No dithering of colors |
The example below is set for 256 colors. You can make a smaller file by selecting fewer colors for the palette.

44. Next click File > Save Optimized As... and in the following dialog provide a file name.

45. Here's the finished animation.
www.sketchpad.net